Step 1. [ Apple Menu ]
|
- |
Click the "Apple" icon to show menu |
|

|
Step 2. [ System Preferences ]
|
- |
Click "System Preferences..." from menu |
|

|
Step 3. [ Network ]
|
- |
Click the "Network" icon in System Preferences |
|

|
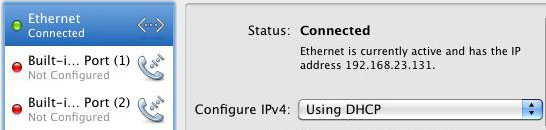
Step 4. [ Device Configuration ]
|
- |
Click the "Ethernet" option from the list on the left |
|
|
Step 5. [ Create PPPoE Service ]
|
- |
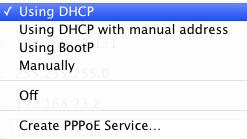
From the "Configure" dropdown, choose "Create PPPoE Service..." |
|
|
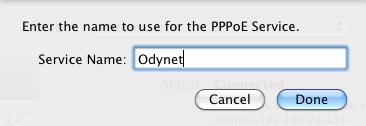
Step 5b. [PPPoE Service Name]
|
- |
For the Service Name, enter "Odynet" |
|
- |
Click the "Done" button |
|
|
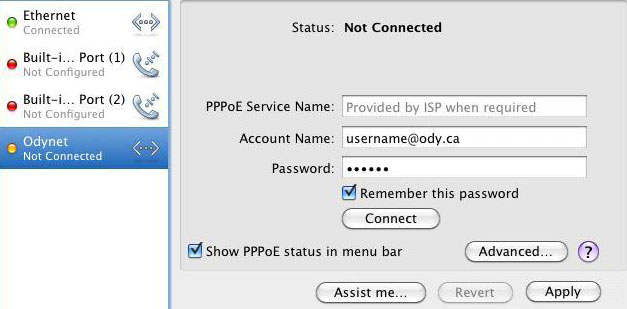
Step 6. [ Enter Credentials and Connect ]
|
- |
Click the new "Odynet" connection from the list on the left |
|
- |
Beside "Account Name:" type in your Odynet username
(remember the @ody.ca) |
|
- |
Type in your Odynet password in the "Password:" field |
|
- |
Place a check in the "Remember this password" checkbox |
|
- |
Place a check in the "Show PPPoE status in menu bar" checkbox |
|
- |
Click the "Apply" button |
|
- |
Click the "Connect" button to start enjoying the Internet now |
|
|
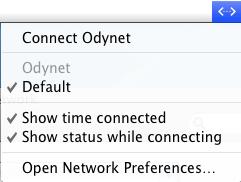
Step 7. [ Connect (Option B) ]
To connect later on (after you restart your computer)
|
- |
Click the Connection icon on the menu bar |
|
- |
Click "Connect Odynet" |
|
|