Configure modem to PPPoE Connection
This walkthrough will provide you with the settings required to re-configure the modem to connect with Odynet.
If using a 3rd party router consult your router's user manual for assistance in finding the equivalent settings.
*Note: For best results, if possible connect the device directly to the router via Ethernet cable.
Click HERE to download the PDF version.
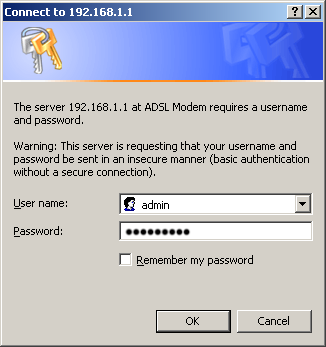
Step 1: Access the modem

A prompt for username and password will appear.
By default, username is 'admin' and password is 'admin'
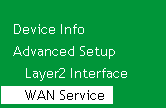
Step 2: Navigate the Configuration page
Choose 'Advanced Setup' then 'WAN Service' from sub-menu
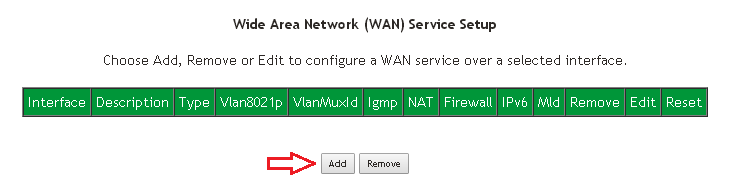
The right screen should have no entries.
Click on the 'Add' button to start setting up a connection.
Step 3: Setting the PPPoE Settings
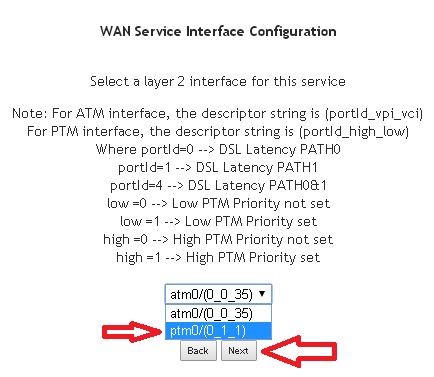
The first page in the configuration select 'ptm0/(0_1_1)', then click 'Next'
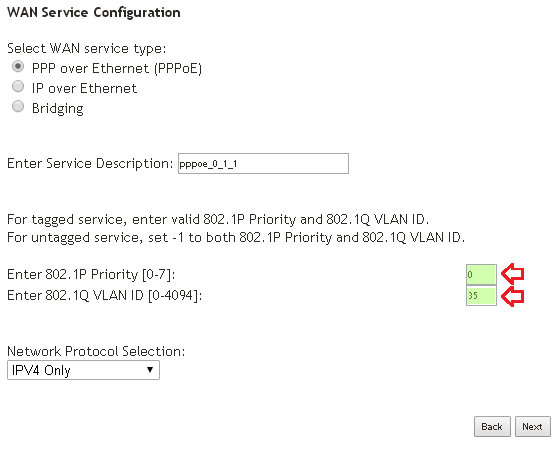
For the next screen choose 'PPP over Ethernet (PPPoE)', Change options 'Priority' to '0' and 'VLAN ID' to '35'.
Click 'Next' to proceed to next screen to enter PPPoE user login information.
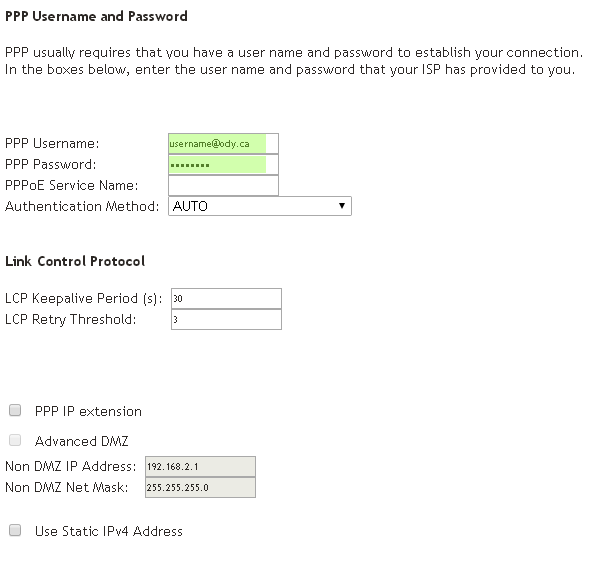
Configure the router with the following PPPoE settings
Username: Odynet username, ending in @ody.ca
Password: The password to Odynet account supplied at signup
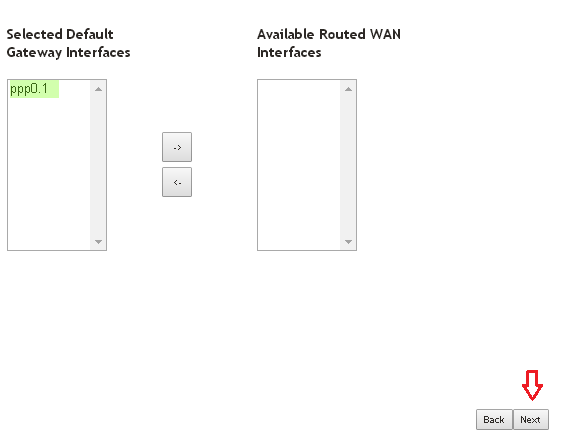
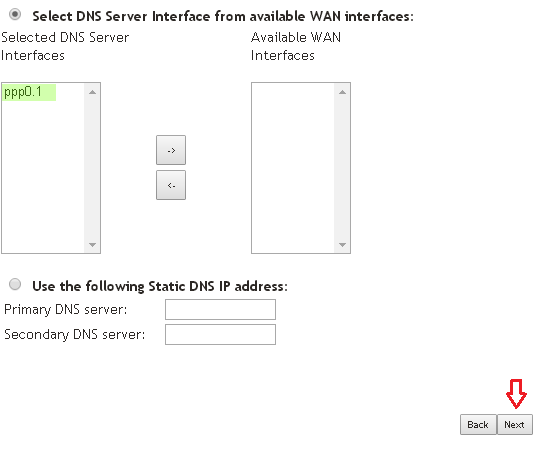
Confirm 'ppp0.1' is in the left list and click next for both Interface and DNS screens.
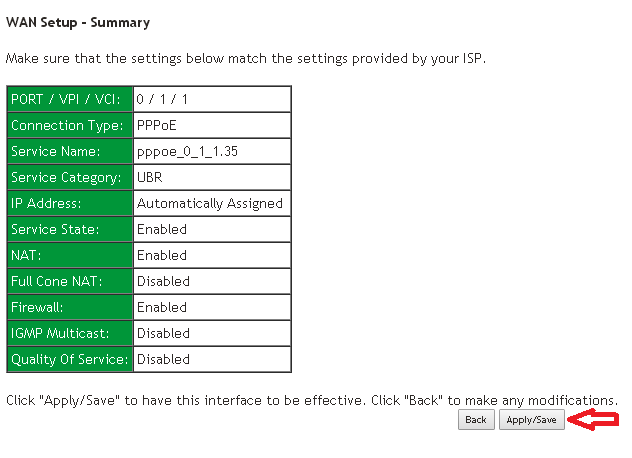
Step 4: Save Settings
On the 'WAN Setup - Summary' page click 'Apply/Save'.