Step 1. [ Open Apple Mail ]
|

|
Step 2. [ Enter Basic Information ]
If the wizard does not open automatically, click 'File' menu, then click 'Add Account...'
|
- |
Type in your name, Odynet email address, and password
|
|
- |
Click the 'Continue' button
|
|

|
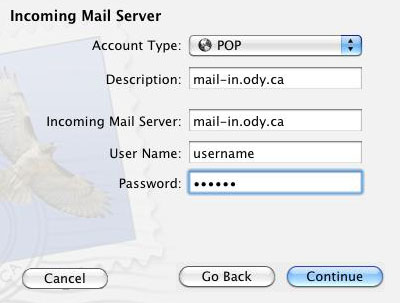
Step 3. [ Incoming Mail Server ]
|
- |
Choose 'POP' from the 'Account Type:' dropdown |
|
- |
For 'Description:', type 'mail-in.ody.ca' |
|
- |
For 'Incoming Mail Server:', type 'mail-in.ody.ca' |
|
- |
The 'User Name:' and 'Password:' fields should be pre-filled with your Odynet username and Odynet password |
|
|
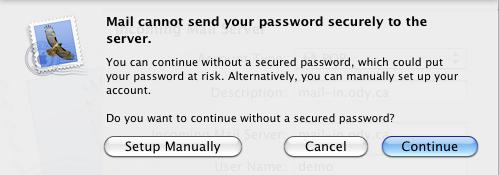
Step 3b. [ Password Security ]
|
- |
If a password security message box pops up, click the 'Continue' button |
|
|
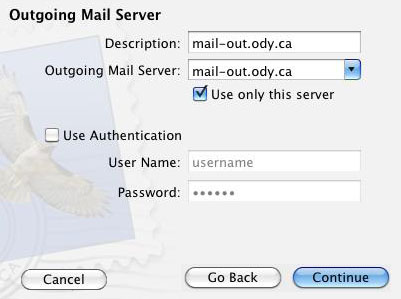
Step 4. [ Outgoing Mail Server ]
|
- |
In the 'Description:' field, type 'mail-out.ody.ca' |
|
- |
In the 'Outgoing Mail Server:' field, type 'mail-out.ody.ca' |
|
- |
Make sure 'Use only this server' is checked |
|
- |
Do NOT place a check beside 'Use Authentication' |
|
- |
Click the 'Continue' button |
|
|
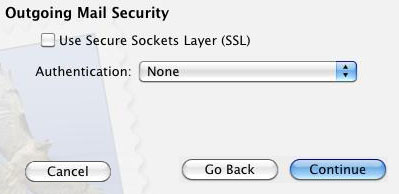
Step 5. [ Outgoing Mail Server Security ]
|
- |
Do NOT place a check beside 'Use Secure Sockets Layer (SSL)' |
|
- |
Choose 'None' from the 'Authentication:' dropdown |
|
- |
Click the 'Continue' button |
|
|
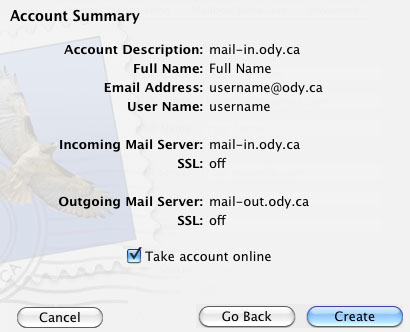
Step 6. [ Account Summary ]
|
- |
Verify everything is correct |
|
- |
Place a check beside 'Take account online' |
|
- |
Click the 'Create' button to complete the setup |
|
|